
Petrol Lawnmower
Petrol Lawnmower

My Petrol Lawnmower Is Leaking Fuel from the Primer Bulb
If fuel is leaking from the primer bulb on your petrol lawnmower, it is usually caused by the carburettor float valve becoming stuck. When this happens, fuel can overfill the carburettor and flow back through the primer system, causing it to leak from the primer bulb.
In many cases, the problem can be resolved by carrying out a simple bleed and tap procedure.
Quick Answer
If your petrol lawnmower is leaking fuel from the primer bulb:
- Locate the carburettor.
- Loosen the carburettor float chamber drain nut.
- Allow fuel to drain for 20–30 seconds.
- Tighten the nut securely.
- Gently tap the float chamber to free the float valve.
- Restart the engine and check whether the leak has stopped.
If fuel continues to leak, the carburettor may require cleaning, servicing or replacement.
Before You Begin
Before carrying out this procedure:
- Switch off the engine and allow it to cool completely.
- Remove the spark plug cap to prevent accidental starting.
- Work in a well-ventilated outdoor area away from naked flames and other sources of ignition.
- Wear suitable personal protective equipment (PPE), including gloves and eye protection.
- Place a suitable container or absorbent cloth beneath the carburettor to catch any fuel that drains out.
Petrol is highly flammable. Clean up any spilled fuel before attempting to restart the engine.
Steps
Step 1 – Locate the Carburettor
Locate the carburettor on the side of the engine.
It is positioned between the air filter housing and the engine and is approximately the size of a fist.
Step 2 – Loosen the Float Chamber Nut
Locate the angled drain nut on the carburettor float chamber.
Using a suitable spanner:
- Loosen the angled nut slightly.
- Do not remove the nut completely.
Fuel will begin to drain from the carburettor.
Step 3 – Bleed Excess Fuel
Allow fuel to drain for approximately 20 to 30 seconds.
This helps relieve excess pressure and may free a sticking float valve.
Step 4 – Tighten the Drain Nut
Once the fuel has drained:
- Tighten the drain nut securely.
- Do not overtighten, as this may damage the carburettor.
Step 5 – Tap the Float Chamber
Using the handle of a screwdriver, a spanner or a similar tool:
- Gently tap the float chamber several times.
This may release a float valve that has become stuck in the open position.
Avoid striking the carburettor with excessive force.
Step 6 – Restart the Lawnmower
Reconnect the spark plug cap.
Start the engine following the normal starting procedure.
If your lawnmower uses a primer bulb, prime the engine as required.
Inspect the primer bulb and carburettor for any further signs of fuel leakage.
Frequently Asked Questions
Why is fuel leaking from my primer bulb?
The most common cause is a stuck carburettor float valve, which allows excess fuel to build up inside the float chamber and flow back through the primer system.
What does the bleed and tap procedure do?
Draining a small amount of fuel reduces pressure inside the carburettor, while gently tapping the float chamber can free a float valve that has become stuck.
Will this fix every primer bulb fuel leak?
No. If the float valve is worn, damaged or contaminated with debris, the carburettor may need to be cleaned, repaired or replaced.
Can I continue using my lawnmower if fuel is leaking?
No. Fuel leaks present a fire risk and should always be repaired before operating the lawnmower.
Why has the float valve become stuck?
A float valve can stick due to stale fuel, dirt or debris inside the carburettor, or after the mower has been stored for an extended period.
What should I do if the primer bulb still leaks after completing these steps?
If the leak continues, inspect the carburettor for contamination or damage. The float valve, float or carburettor seals may require servicing or replacement.
View ArticleRemoving and Replacing the Exhaust on an SE475 Engine
If your SE475 engine exhaust is damaged, blocked or excessively noisy, it may need to be removed and replaced. A faulty exhaust can affect engine performance, increase noise levels and in some cases cause starting or running issues.
This guide explains how to safely remove and replace the exhaust assembly on an SE475 engine.
Quick Answer
To replace the exhaust on an SE475 engine:
- Remove the two 10mm exhaust retaining nuts.
- Remove the exhaust cover.
- Detach the exhaust assembly from the engine.
- Check and position the exhaust gasket.
- Fit the new exhaust and refit the cover.
- Tighten the retaining nuts securely and test the engine.
Always ensure the gasket is correctly seated before reassembly.
Before You Begin
Before starting this repair:
- Switch off the engine and allow it to cool completely.
- Remove the spark plug cap to prevent accidental starting.
- Work in a well-ventilated area.
- Wear suitable protective gloves, as exhaust components may have sharp edges or heat damage.
Tools required:
- 10mm spanner or socket wrench
Steps
Step 1 – Remove the Exhaust Retaining Nuts
Locate the exhaust mounting points on the engine.
Using a 10mm spanner or socket:
- Remove the two exhaust retaining nuts.
These are typically positioned on either side of the exhaust assembly.
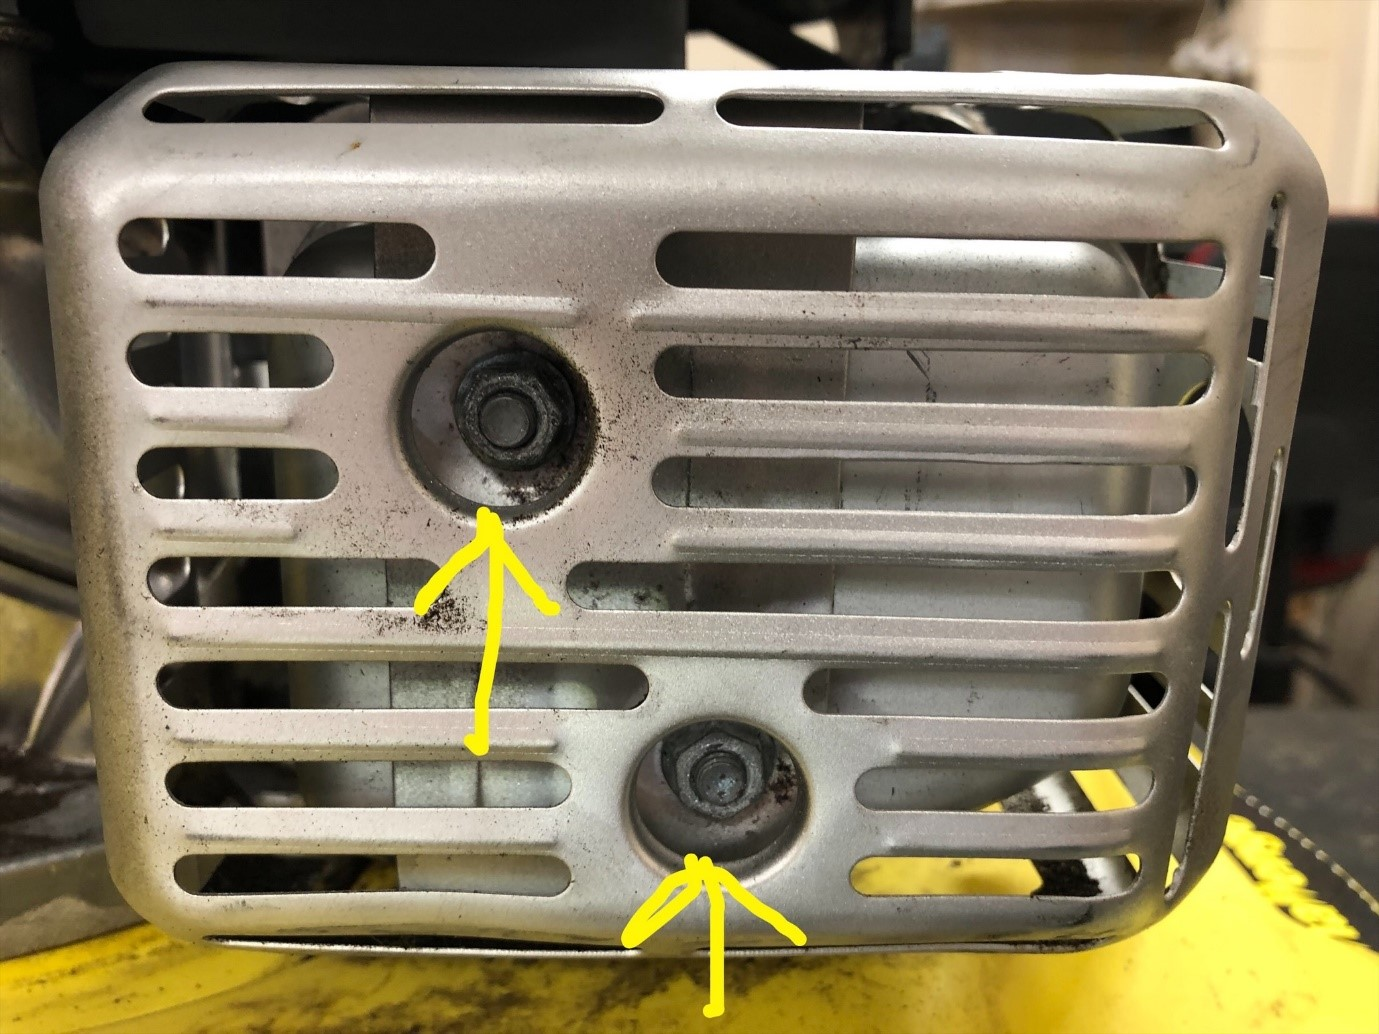
Step 2 – Remove the Exhaust Cover
Once the retaining nuts have been removed:
- Carefully lift off the exhaust cover.
- Place it safely to one side.
Take care not to damage any surrounding components during removal.
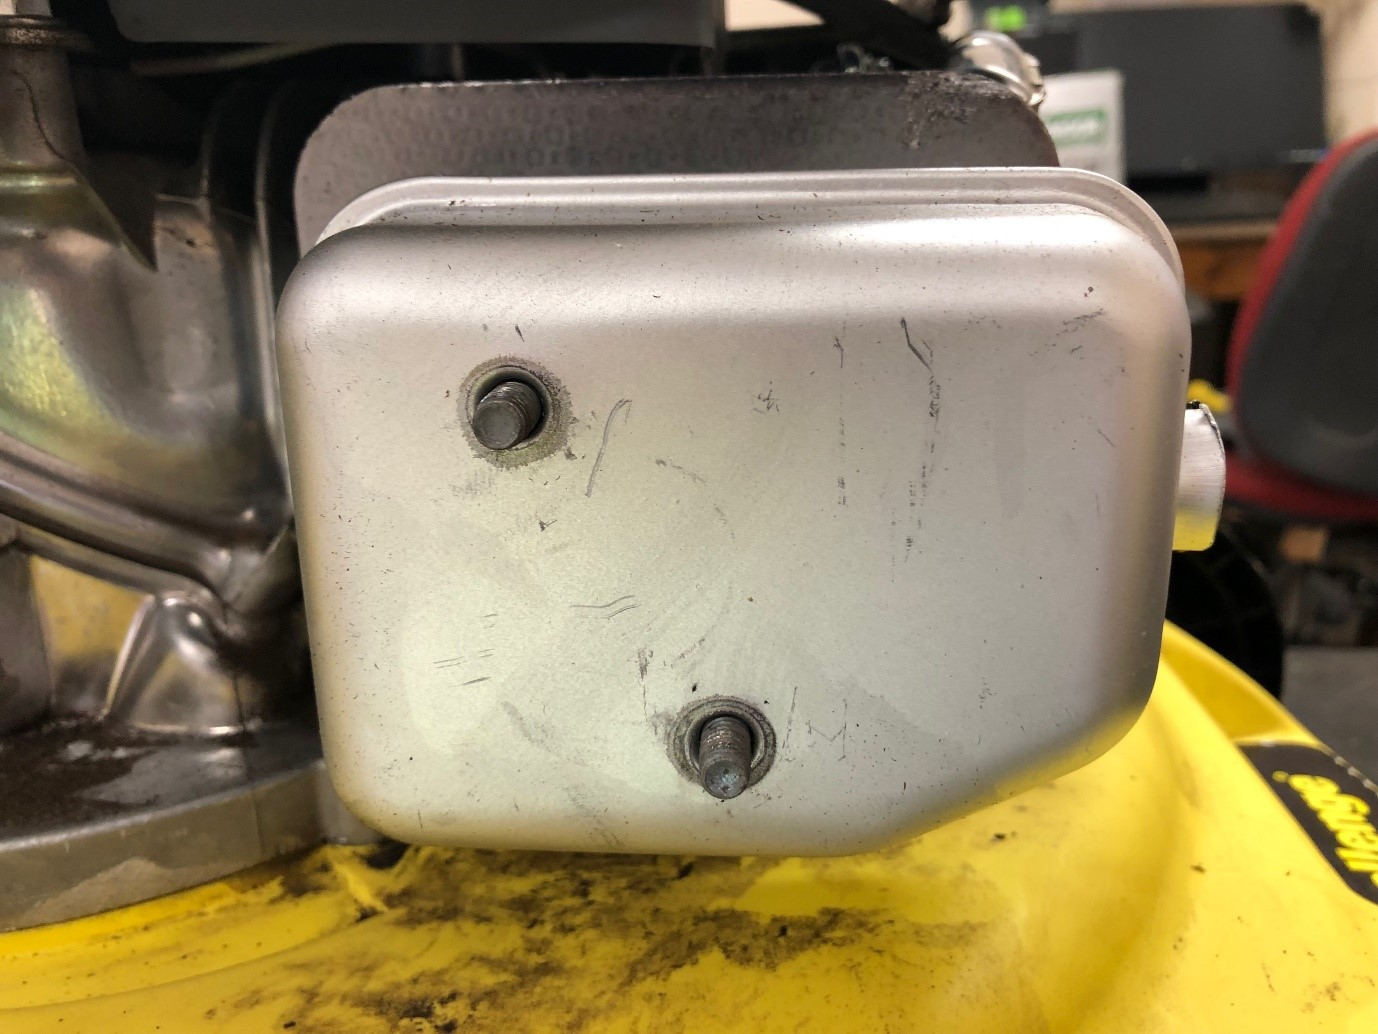
Step 3 – Remove the Exhaust Assembly
With the cover removed:
- Carefully detach the exhaust assembly from the engine.
- Slide it away from the mounting studs or bolts.
- Set it aside on a safe surface.
If resistance is felt, gently wiggle the exhaust to free it from the gasket seal.
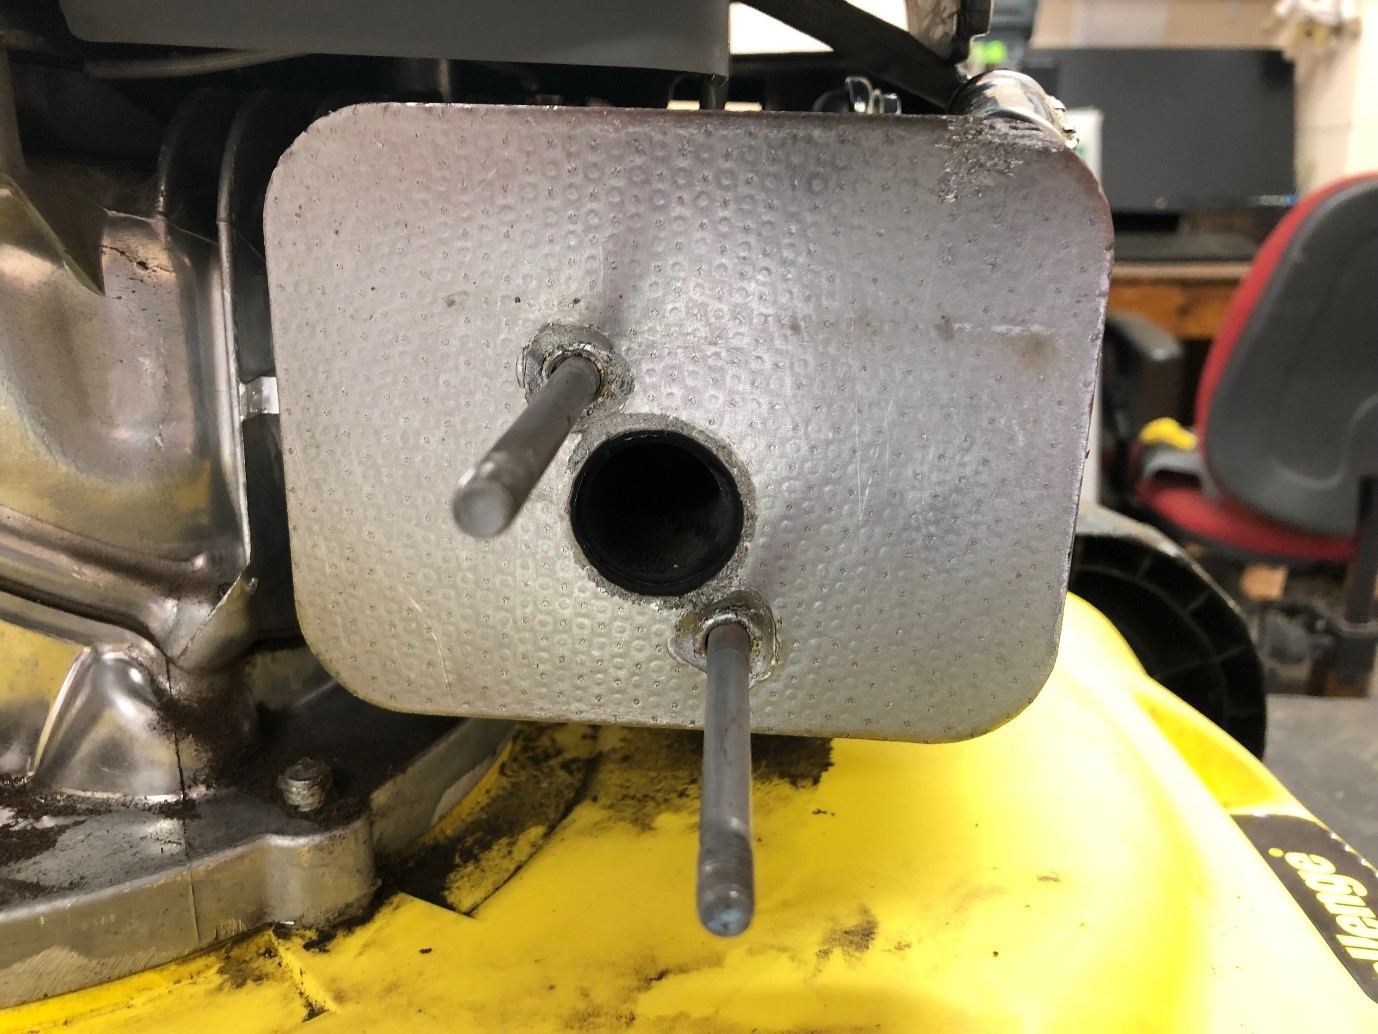
Replacing the Exhaust
Step 4 – Fit the New Exhaust Assembly
Before installation:
- Inspect the exhaust heat gasket.
- Ensure it is not cracked, burnt or damaged.
- Replace the gasket if necessary.
Then:
- Position the new exhaust assembly onto the engine.
- Align it correctly with the mounting points.
- Ensure it sits flush against the engine surface.
Step 5 – Refit the Exhaust Cover
- Place the exhaust cover back into position.
- Align it with the mounting holes.
- Ensure it sits correctly without obstruction.
Step 6 – Secure the Assembly
Using a 10mm spanner or socket:
- Refit the two exhaust retaining nuts.
- Tighten them evenly and securely.
Do not overtighten, as this may damage the threads or distort the exhaust housing.
Final Checks
After installation:
- Confirm the exhaust is firmly secured.
- Check the gasket is properly seated with no gaps.
- Ensure all components are correctly aligned.
- Start the engine briefly and listen for abnormal noise or leaks.
If you notice excessive noise, vibration or exhaust leakage, switch off the engine and recheck the installation.
Frequently Asked Questions
Why would I need to replace an engine exhaust?
Common reasons include rust, cracks, blockages, excessive noise or damage caused by overheating or impact.
What happens if the exhaust gasket is damaged?
A damaged gasket can cause exhaust leaks, reduced engine performance and increased noise. It should always be replaced when fitting a new exhaust.
Can I run the engine without an exhaust fitted?
No. Running the engine without an exhaust can cause noise hazards, poor performance and potential engine damage.
Why is my new exhaust leaking?
Leaks are usually caused by incorrect gasket placement, loose retaining nuts or misalignment between the exhaust and engine mounting surface.
Do I need to tighten the exhaust nuts very tightly?
No. The nuts should be firm and secure but not overtightened, as this may damage the threads or exhaust housing.
Will replacing the exhaust improve engine performance?
If the old exhaust was blocked or restricted, replacing it can improve airflow, starting reliability and overall engine performance.